
Adjust Your Audio Settings For Music Lessons In Zoom
Zoom’s default sound settings are designed for speaking. As a result of this, you need to adjust some settings to optimise sound for music lessons.
Instructions For Desktop Computers (for iPad / Smart Phone – see below)
1. Click the Settings icon in the top right corner of the ZOOM window.
2. Select Audio from the Settings menu.
3. Remove the tick from the box “Automatically Adjust Microphone Volume”.
4. Click the Advanced button in the bottom right corner.

5. Tick the box to “Show in-meeting option to Enable Original Sound from microphone”.

6. Close the Settings window.
7. When you are in a video meeting you will see a button in the top left corner that says “Turn On Original Sound”. Remember to click this button to “Turn On Original Sound” when you are in a lesson to ensure you get the best sound for music.
Instructions For iPad / Mobile
1. Login to the Zoom App
2. Click the Settings button in the bottom left corner

3. Tap the Meetings menu

4. Check the option to “Use Original Sound”

5. You can now close the Settings window.
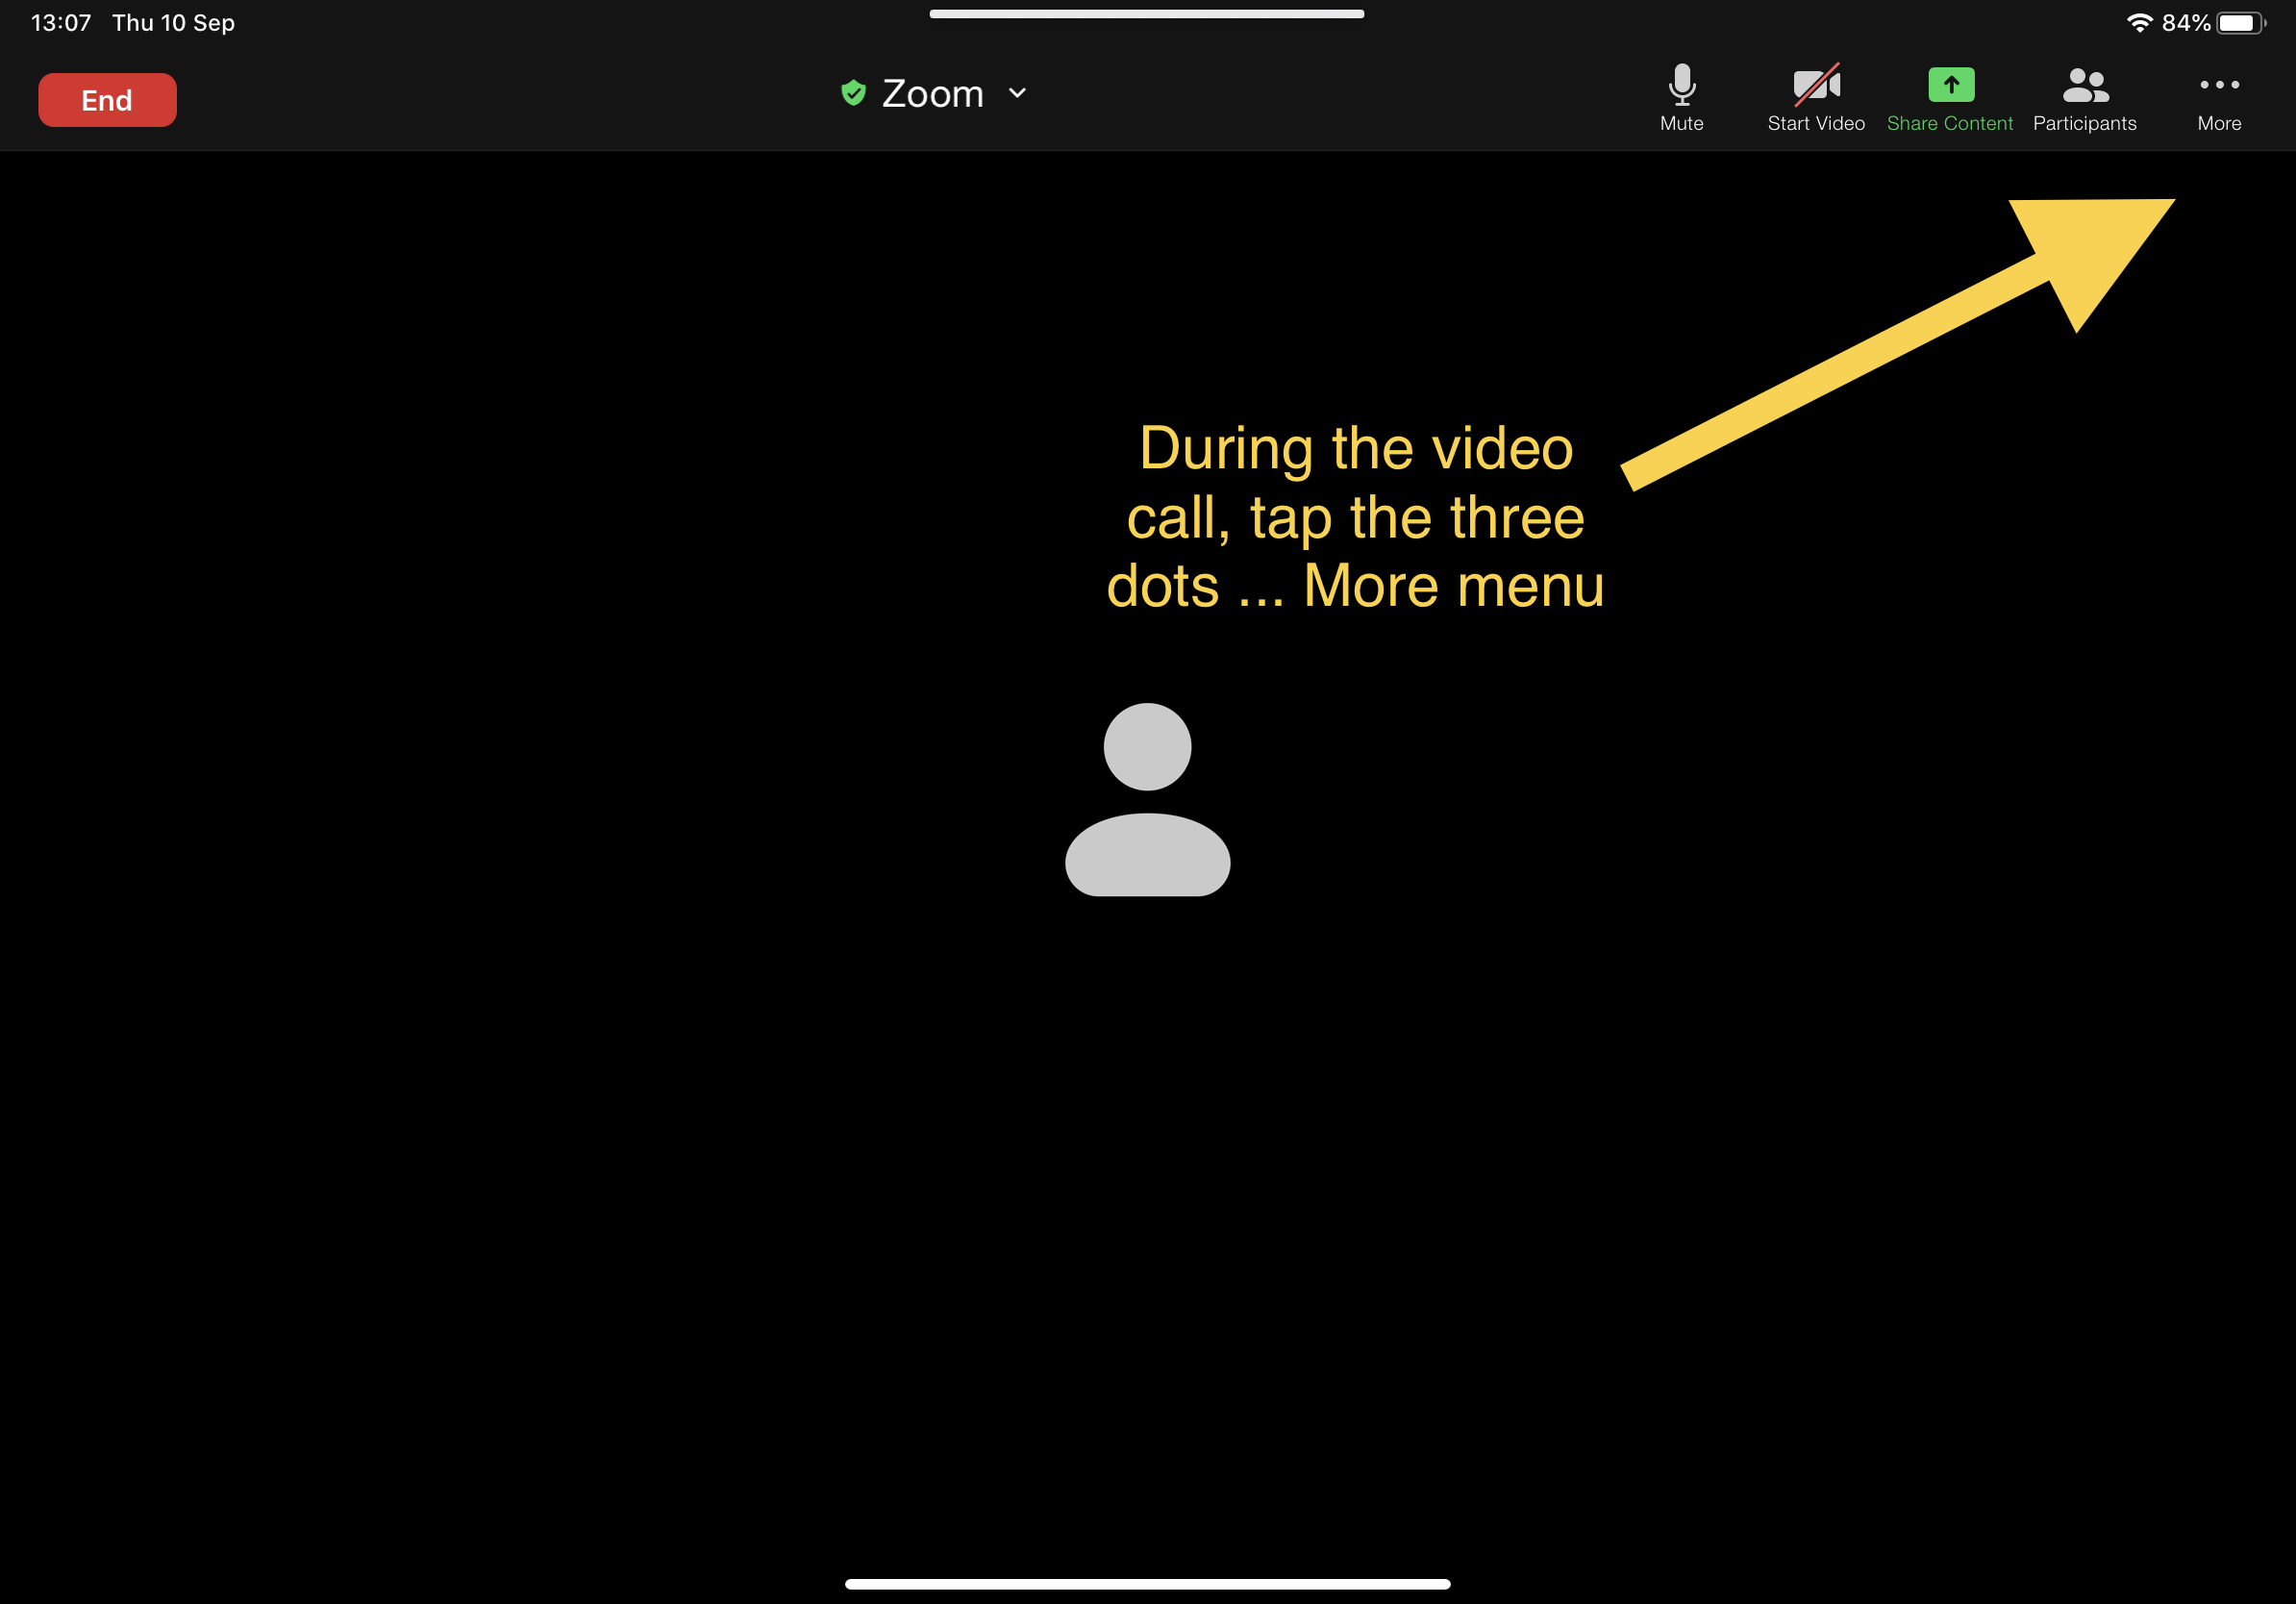
6. During your music lesson, tap the three dots … More menu in the top right corner.
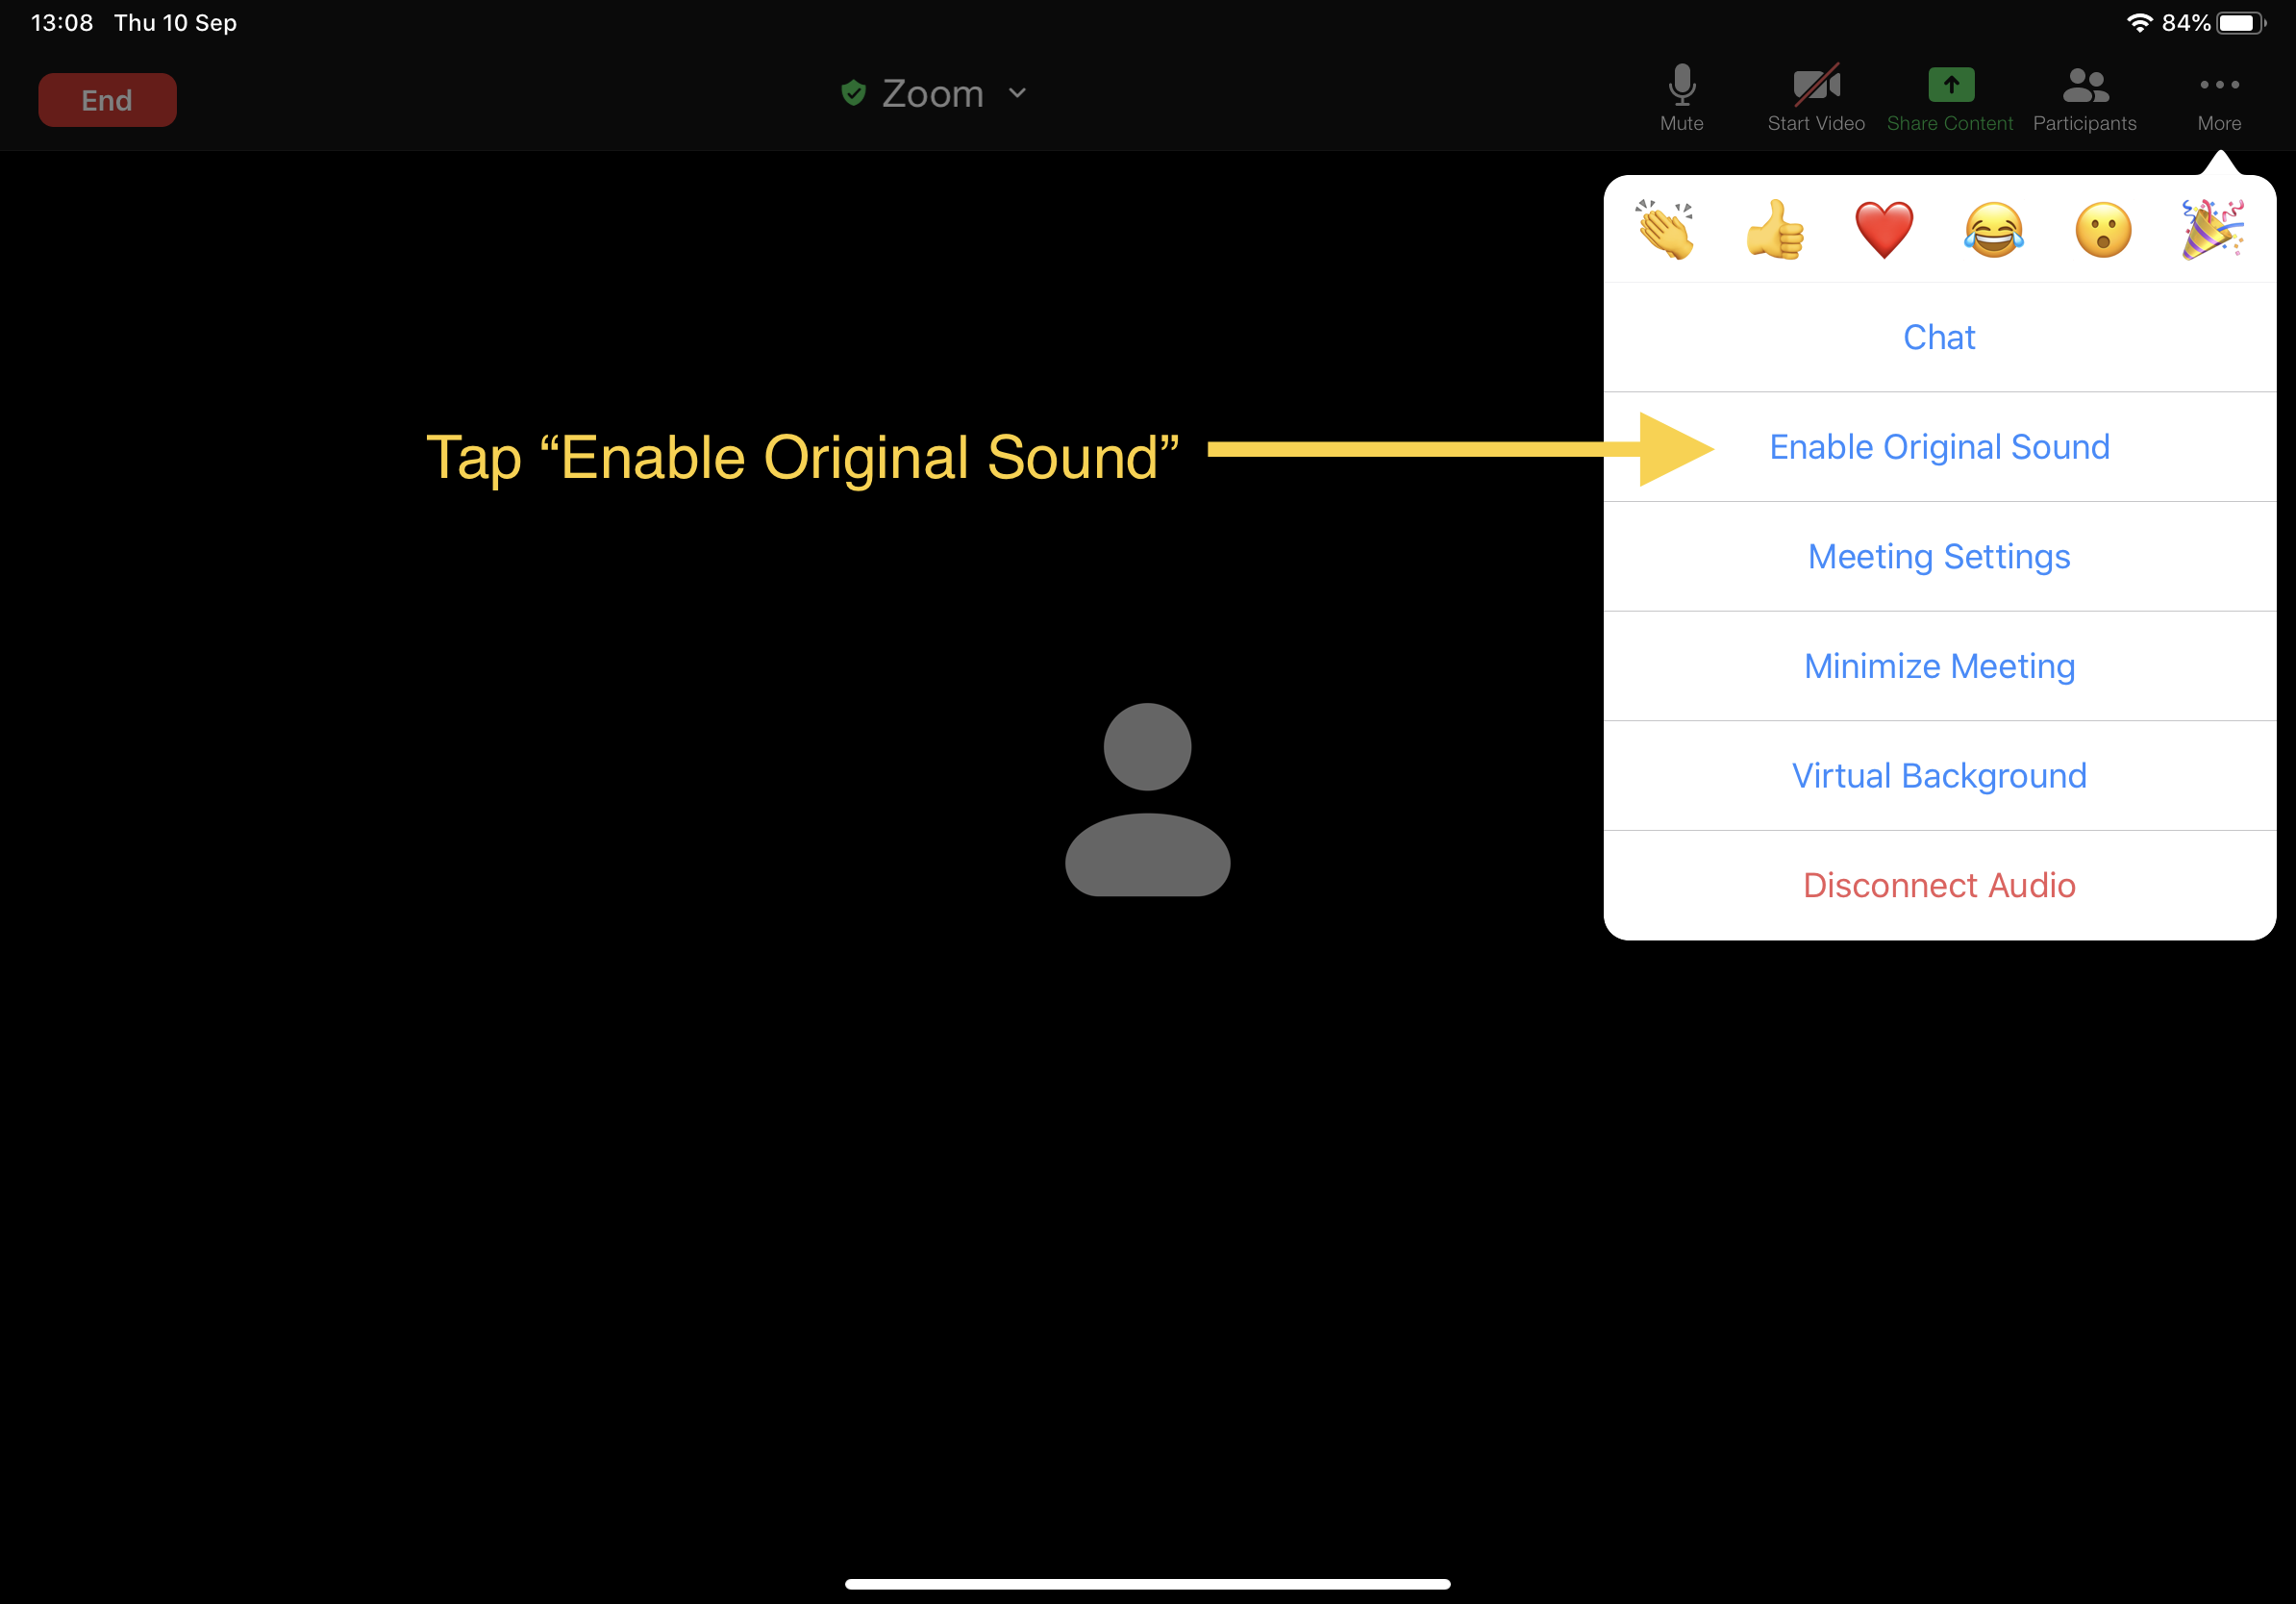
7. Then tap “Enable Original Sound”. Remember to tap this option to “Enable Original Sound” whenever you are in a lesson to ensure you get the best sound for music.
If you have any problems with audio quality during your Zoom lesson, don’t hesitate to get in touch or ask your teacher to help you to adjust your settings.
